
Melcourt Sylvagrow: everything you need to know
10 Minute Read
Melcourt Sylvagrow is a treasured favourite amongst gardeners and growers alike, we explore what makes this compost a top seller.Sylvagrow is a well known and well-loved product by growers and gardeners alike and with numerous options within the Sylvagrow range, in this article, we're taking a look at what each product does, what plants It is best used for and how it can be used across multiple applications!
Sylvagrow is a peat-free alternative and supports steady and stable plant growth and is trusted by many industry experts. There are eight different composts within the Sylvagrow family so let's explore the various options and this spectacular compost will help give your plants all of the nutrients they need to grow healthy and strong.
Sylvagrow is a peat-free alternative and supports steady and stable plant growth and is trusted by many industry experts. There are eight different composts within the Sylvagrow family so let's explore the various options and this spectacular compost will help give your plants all of the nutrients they need to grow healthy and strong.

Melcourt SylvaGrow Rose, Tree & Shrub Compost
SylvaGrow Rose, Tree and Shrub is a rich, free flowing, carefully formulated planting compost for effective establishment in garden soils. 100% peat-free and containing balanced slow-release nutrients.
• Made from natural, British sustainable materials, bark and green compost
• Improves the soil quality, when planting bare root, root balled and container-grown roses, trees and shrubs
• Proven to be successful and effective in use
• Provides long term slow release of nutrients
• Adds valuable organic matter thus aiding nutrient retention and water-holding capacity
• Suitable for use by vegans
• RHS endorsed
SHOP NOW
Sylvagrow All Purpose Peat Free Compost with Added John Innes
All-purpose loam-based compost for general-purpose composting or use in grow bags. Melcourt Sylvagrow All Purpose Peat Free Growing Medium with added John Innes has no peat or green waste compost. Use it throughout the garden in pots or garden beds and in vegetable grow bags. Includes fertiliser to give plants the best start.
• Not suitable for raising lime-hating, ericaceous plants in containers.
• Superb quality, 100% peat-free compost with added sterilised loam & silver sand
• Sustainably sourced materials
• RHS Endorsed
• Suitable for vegans
SHOP NOW
Sylvagrow Peat-Free Planter For Organic Growing
Is based on a formula used by professional organic growers throughout the UK and is Soil Association approved. The Sylvagrow peat-free planter contains balanced organic fertilisers and seaweed meal for excellent vigour and disease resistance and performs best when routine liquid feeding is applied from around 3-4 weeks.At the end of the season, the contents of the Planter can be used as a general soil improver.
SHOP NOW

Sylvagrow Organic Peat Free Multi Purpose Compost
Melcourt Sylvagrow Organic Peat Free Multi Purpose Compost is a peat free organic compost. Melcourt Sylvagrow is a mix of bark, green compost and coir. Bark and coir provide extra drainage and aeration while a mix of organic fertilisers and seaweed encourage growth. This multi purpose compost can be used in many areas of the garden including beds & borders or the vegetable patch. Start liquid feeding after 3-4 weeks. Soil Association and Royal Horticultural Society approved.SHOP NOW
Sylvagrow Tub & Basket
Superb quality, 100% peat-free compost for tubs, troughs and hanging baskets. Melcourt SylvaGrow Tub & Basket Compost can be used for a wide range of plants including bedding, tomatoes, strawberries, peppers, herbs, fruit, shrubs and perennials. Tub & Basket contains rich, balanced nutrients sufficient for the first 4 – 6 weeks of growth.SHOP NOW
Sylvagrow Ericaceous Compost
Peat free ericaceous compost for acid loving plants. Melcourt Sylvagrow Ericaceous Compost mix contains bark, wood fibre, coir, loam and sand. Added nutrients help initial plant growth. This compost has no peat or green waste. Use in a raised bed or when planting out beds & borders with heathers or rhododendrons and other acid loving species.SHOP NOW
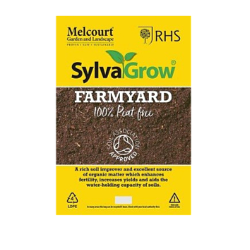
Melcourt Sylvagrow Farmyard Soil Improver
Farmyard from the Melcourt Sylvagrow range (previously knows as Melcourt Farmyard Manure). Farmyard is an organic peat free soil improver which suppresses weeds, adds nutrients and improves water retention. Used by home gardeners and professional landscapers to improve soil condition and increase organic matter. Mulch into beds & borders and around trees and shrubs. RHS endorsed.SHOP NOW
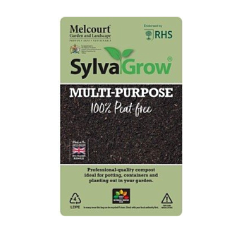
Sylvagrow Multi-Purpose
Sylvagrow is a unique blend of fine bark, wood fibre (bi products of sustainably managed British forests) and coir (from a single known source). It contains balanced nutrients sufficient for the first 4 – 6 weeks of growth. Sylvagrow does not contain peat or green waste compost. SylvaGrow Multi-purpose is not suitable for raising lime-hating, ericaceous plants in containers.
SHOP NOW
How to use Sylvagrow
Applicable for Sylvagrow with added John Innes, Sylvagrow Multi-Purpose and Sylvagrow Organic.
Seed Sowing
• Fill a seed tray evenly with SylvaGrow®, tapping gently to settle
• Lightly water with a fine hose.
• Sow the seeds carefully, according to the packet instructions, cover with more SylvaGrow® to a depth as directed.
• Cover the seed tray with glass or polythene and put in a warm place out of direct sunlight.
• Remove the cover when the seeds have germinated, ensure the SylvaGrow® is kept evenly moist at all times.
• Prick out as soon as the seedlings are large enough to handle NB For very small seeds such as Begonia or Impatiens, sieve the SylvaGrow® before use to remove the larger particles, which can otherwise impede seedling development.
Pricking Out
• When the seedlings are large enough to handle, gently tease them out of the growing medium using a dibber or pencil, taking care to handle only by the leaves.
• Fill a suitable pot with fresh SylvaGrow®, use a dibber to make a hole and place the seedling in it, tapping the pot to settle the mix around the roots.
• Water gently but thoroughly.
• After four to six weeks, regularly apply a liquid feed, following the manufacturer’s instructions. Alternatively, at the time of pricking out, incorporate slow-release fertilizer granules according to the manufacturer’s instructions.
Potting on, containers, tubs, troughs, hanging baskets and house plants
• First, ensure that the plant to be potted on has been well-watered. If it is dry, immerse the roots in a bucket of water for half an hour.
• Fill the pot, tub or container with SylvaGrow®.
• Make a hole large enough to accommodate the item to be potted and insert it, taking care that the growing medium is at about the same height on the stem as previously.
• Gently firm the SylvaGrow® around the plant, water thoroughly.
• Ensure that the SylvaGrow® is kept moist but not over-wet, at all times. Hanging baskets have a particularly high water requirement and may need watering every day in warm weather.
• After four to six weeks, regularly apply a liquid feed, following the manufacturer’s instructions. Alternatively, at the time of potting incorporate slow-release fertilizer granules according to the manufacturer’s instructions.
Cuttings
• Ensure the mother plant is well-watered before taking cuttings.
• Fill a deep seed tray or pot with the SylvaGrow® and make a suitable hole with a dibber or pencil.
• Prepare the stem or root cuttings according to type, ensuring that they are not allowed to dry out between cutting and inserting. Dip in hormone rooting powder/liquid if using.
• Insert the cutting and gently firm the medium around it.
• Stem cuttings need to be in a moist environment out of direct sunlight until they have rooted so either place in a cold frame, a covered propagator or cover with polythene, using supports to prevent the polythene from touching the cuttings. Root cuttings can be placed in a cold frame or sheltered spot out of direct sunlight and can benefit from a thin layer of grit on the growing medium surface.
• Once the cuttings are well-rooted they can be potted on according to the instructions above.
Raised Beds
SylvaGrow® can be used as part of a raised bed medium for vegetable and strawberry growing. Simply mix 1 part SylvaGrow® thoroughly with 3 to 4 parts loam or garden soil to gain a valuable addition of organic matter and nutrients. Remember to supplementary feed as instructed above in ‘Potting On’ as vegetables are heavy feeders and will respond well.
Planting Out
SylvaGrow® can be used as a planting medium for roses, shrubs, trees, herbaceous perennials and bedding plants in order to add valuable organic matter and nutrients. Simply blend at 1 part to 4 parts of the back-fill soil. Always ensure that the plant is watered to capacity before planting out and if necessary, immerse the roots in a bucket of water for half an hour prior to planting. Ensure that the planting pit is well-integrated with the wider soil with no smeared sides or other impediments to root exploration beyond the planting hole.
Lime-hating, ericaceous plants
SylvaGrow® is not suitable for raising lime-hating, ericaceous plants in containers although it can be used as planting out the medium for an ericaceous soil at rates of 1 part SylvaGrow® to 4 parts acidic soil.
Grow Bag
SylvaGrow® with added John Innes can be used in its original packaging as a very successful grow bag. Simply lay the bag flat on its side, cut drainage slits in the base along both sides of the bag and use for tomatoes, strawberries, herbs, lettuces, aubergines, peppers, chillies etc. Apply liquid feed according to the manufacturer’s instructions after 3 to 5 weeks.
SylvaGrow® is best used within the season of purchase. Longer storage can cause a nutrient imbalance.
How to Use Sylvagrow Tub & Basket
• First, ensure that the plants to be potted have been well-watered. If dry, immerse the roots in water for half an hour.
• Fill the pot, tub containers with SylvaGrowTub and Basket.
• Make holes large enough to accommodate the items to be potted and insert, taking care that the growing medium is at about the same height on the stem as previously.
• Gently firm the SylvaGrow Tub and Basket around the plants and water thoroughly.
• Ensure that the SylvaGrow Tub and Basket is kept moist but not over-wet at all times but avoid too much run-off as this can leach the nutrients away.
• After four weeks, regularly apply a liquid feed, following the manufacturer’s instructions. Alternatively, at the time of potting, incorporate controlled-release continuous-feed fertilizer granules according to the manufacturer’s instructions.
Planting up hanging baskets
• First, ensure that the plants to be potted have been well-watered and if dry, immerse the roots in water for half an hour • Stand the hanging basket on a wide, sturdy plant pot to keep it stable.
• Put the hanging basket liner in place and place a circle of plastic or plant pot saucer at the bottom to aid water retention.
• If planting trailing plat through the sides of the hanging basket, fill up to the required height with SylvaGrow Tub and Basket and then put the plant in place taking care not to damage the roots or foliage. Fill with more compost working up in the same way until the hanging basket is full.
• Make holes large enough to accommodate the plants to be potted at the top of the basket and insert them, taking care throughout that the growing medium is at about the same height on the stems as previously.
• Gently firm the SylvaGrow Tub and Basket around the plants and water thoroughly but avoid too much run-off as this can leach the nutrients away.
• Ensure that the SylvaGrow Tub and Basket is kept moist but not over-wet at all times. Hanging baskets have a particularly high water requirement and may need watering every day in warm weather.
• After four weeks, regularly apply a liquid feed, following the manufacturer’s instructions. Alternatively, at the time of potting incorporate controlled-release continuous-feed fertilizer granules according to the manufacturer’s instructions.
Lime-hating, ericaceous plants
SylvaGrow Tub and Basket is not suitable for raising lime-hating, ericaceous plants in containers although it can be used for planting as ericaceous soil at rates of 1 part SylvaGrow Tub and Basket to 4 parts acidic soil. For ericaceous, lime-hating plants in containers use SylvaGrow® Ericaceous.
A regular liquid feed after four weeks will keep your plants looking great!
How to use Sylvagrow Ericaceous Compost
Potting on, containers, tubs and troughs
• Firstly ensure that the plant to be potted on has been well-watered. If it is dry, immerse the roots in a bucket of water (preferably rainwater) for half an hour.
• Fill the pot, tub or container with SylvaGrow® Ericaceous.
• Make a hole large enough to accommodate the item to be potted and insert it, taking care that the growing medium is at about the same height on the stem as previously.
• Gently firm the SylvaGrow® Ericaceous around the plant and water thoroughly.
• Ensure that the SylvaGrow® Ericaceous is kept moist but not over-wet, at all times.
• After four to six weeks, regularly apply a proprietary ericaceous liquid feed, following the manufacturer’s instructions. Alternatively incorporate slow-release fertiliser granules according to the manufacturer’s instructions, at the time of potting.
Cuttings
• Ensure the mother plant is well-watered before taking cuttings.
• Fill a deep seed tray or pot with SylvaGrow®Ericaceous and make a suitable hole with a dibber or pencil.
• Prepare the stem cuttings according to type, ensuring that they are not allowed to dry out between cutting and inserting. Dip in hormone rooting powder/liquid if using.
• Insert the cutting and gently firm the medium around it.
• Stem cuttings need to be in a moist environment out of direct sunlight until they have rooted so either place in a cold frame, a covered propagator or cover with polythene, using supports to prevent the polythene from touching the cuttings.
• Once the cuttings are well-rooted they can be.
Raised Beds
SylvaGrow® Ericaceous can be used as part of a raised bed medium for lime-hating plants.
• Simply mix 1 part SylvaGrow® Ericaceous thoroughly with 3 to 4 parts acidic garden soil to gain a valuable addition of organic matter and nutrients.
• Remember to supplementary feed as instructed above in ‘Potting On’. If the soil used is not acidic, (which is not recommended for best results) use up to 1 part SylvaGrow® Ericaceous to 1 part soil and be particularly vigilant regarding supplementary feeding with an appropriate fertilizer for lime-hating plants.
• Keep the soil moist at all times particularly during the first year as the plants are becoming established.
Planting Out
SylvaGrow® Ericaceous can be used as a planting medium for lime hating plants in order to add valuable organic matter and nutrients to acidic soils. • Simply blend at 1 part to 4 parts of the back-fill soil.
• Always ensure that the plant is watered to capacity before planting out and if necessary, immerse the roots in a bucket of water (preferably rainwater) for half an hour prior to planting.
• Ensure that the planting pit is well-integrated with the wider soil with no smeared sides or other impediments to root exploration beyond the planting hole.
• If the soil is not acidic, (which is not recommended for best results) use up to 1 part SylvaGrow® Ericaceous to 2 parts soil and be particularly vigilant regarding supplementary feeding with an appropriate fertilizer for lime-hating plants. • Keep the soil moist at all times particularly during the first year as the plants are becoming established.
Other Advice
• Try always to use rainwater when watering lime- hating plants, particularly in hard water areas.
How to Use Sylvagrow Peat-Free Planter
Shake the Planter in order to loosen and evenly distribute the contents. Cut out the relevant number of holes in the top of the Planter using the guide below. (There are guidelines for three holes on the Planter but any number of holes or even one large hole can be cut out, according to need.)
For well-established young plants
• First, ensure that the plants to be potted have been well-watered.
• Make holes large enough to accommodate the items to be potted, insert the plants and firm gently around the stem.
• Water thoroughly. Take care always to avoid wetting the crowns and fruit of strawberries as this can promote disease.
• Ensure that the Planter is kept evenly moist but not over-wet, at all times.
• As the first flowers appear, commence liquid feeding. If using a conventional fertilizer (non-organic) apply according to the manufacturer’s instructions (usually around every 10 -1 4 days).
• If you wish to maintain the organic status of the crop, choose an organic liquid feed (preferably a Soil Association approved product). Commence feeding at three weeks after potting or when the first flowers appear if this comes first. Apply feed at every other watering, increasing to every watering once the plant is cropping.
For Lettuce and herbs
• Firstly, ensure that the plants to be potted have been well-watered.
• Make holes large enough to accommodate the items to be potted, insert the plants and firm gently around the stem.
• Water thoroughly.
• Ensure that the Planter is kept evenly moist but not over-wet, at all times.
Beans and peasare best direct sown into the Planter and thinned at rates according to the seed packet instructions. Liquid feed according to the instructions above once the plants are well-established – this will typically be around 5 -6 weeks after sowing.
For Potatoes
In the upright position, the Planter works very well as a potato bag.
• Firstly chit the seed potatoes (place in a light, frost-free place with the sprouting end up). When the shoots are around 3cm long the tubers are ready for planting.
• Remove all but around a 15cm depth of compost in the Planter and set aside in a clean, dry place.
• IMPORTANT - Pierce drainage holes in the base of the Planter, just above ground level.
• Plant the tubers just below the surface. As the shoots grow, gradually replace the compost, always leaving the top of the shoot well above compost level, until the Planter is full. Commence feeding once all the compost has been replaced.
• If using a conventional fertilizer (non-organic) apply according to the manufacturer’s instructions (usually around every 10 -1 4 days).
• If you wish to maintain the organic status of the crop, choose an organic liquid feed (preferably a Soil Association approved product). Apply feed at every other watering increasing to every watering after around 4 weeks.
Salad leaves, rocket, mizuna, microgreens, spinach, pea shootscan be direct sown into the Planter. Cut one or two large holes in the Planter and then sow seeds at depths and densities according to the instructions on the seed packet. Supplementary liquid feeding is unlikely to be necessary but may be desirable if the crop has been in the Planter for more than 6 weeks.
- Tomatoes, cucumbers, peppers, courgettes, aubergines: 1-3 plants per bag.
- Lettuce, herbs and strawberries: 6-9 plants per bag.
- Beans, peas: 5-15 per bag.
- Potatoes: 5 tubers
- Salad leaves, rocket, mizuna, microgreens, spinach, pea shoots: numerous
For well-established young plants
• First, ensure that the plants to be potted have been well-watered.
• Make holes large enough to accommodate the items to be potted, insert the plants and firm gently around the stem.
• Water thoroughly. Take care always to avoid wetting the crowns and fruit of strawberries as this can promote disease.
• Ensure that the Planter is kept evenly moist but not over-wet, at all times.
• As the first flowers appear, commence liquid feeding. If using a conventional fertilizer (non-organic) apply according to the manufacturer’s instructions (usually around every 10 -1 4 days).
• If you wish to maintain the organic status of the crop, choose an organic liquid feed (preferably a Soil Association approved product). Commence feeding at three weeks after potting or when the first flowers appear if this comes first. Apply feed at every other watering, increasing to every watering once the plant is cropping.
For Lettuce and herbs
• Firstly, ensure that the plants to be potted have been well-watered.
• Make holes large enough to accommodate the items to be potted, insert the plants and firm gently around the stem.
• Water thoroughly.
• Ensure that the Planter is kept evenly moist but not over-wet, at all times.
Beans and peasare best direct sown into the Planter and thinned at rates according to the seed packet instructions. Liquid feed according to the instructions above once the plants are well-established – this will typically be around 5 -6 weeks after sowing.
For Potatoes
In the upright position, the Planter works very well as a potato bag.
• Firstly chit the seed potatoes (place in a light, frost-free place with the sprouting end up). When the shoots are around 3cm long the tubers are ready for planting.
• Remove all but around a 15cm depth of compost in the Planter and set aside in a clean, dry place.
• IMPORTANT - Pierce drainage holes in the base of the Planter, just above ground level.
• Plant the tubers just below the surface. As the shoots grow, gradually replace the compost, always leaving the top of the shoot well above compost level, until the Planter is full. Commence feeding once all the compost has been replaced.
• If using a conventional fertilizer (non-organic) apply according to the manufacturer’s instructions (usually around every 10 -1 4 days).
• If you wish to maintain the organic status of the crop, choose an organic liquid feed (preferably a Soil Association approved product). Apply feed at every other watering increasing to every watering after around 4 weeks.
Salad leaves, rocket, mizuna, microgreens, spinach, pea shootscan be direct sown into the Planter. Cut one or two large holes in the Planter and then sow seeds at depths and densities according to the instructions on the seed packet. Supplementary liquid feeding is unlikely to be necessary but may be desirable if the crop has been in the Planter for more than 6 weeks.
How to use Sylvagrow Soil Improver
As a mulch on borders, around trees, on vegetable plots and raised beds:
Spread 5-8 cms (2-3 inches) of Farmyard Manure on the soil surface having first removed any weeds. Very effective around established plants but avoid going right up to stems and trunks.
Helps to conserve moisture, suppress weeds, gradually feeds the soil and will eventually be incorporated into the soil by earthworms and other soil fauna. Also suitable for no-dig growing systems.
As a soil improver for borders, vegetable plots and raised beds:
Spread between 5-8 cms (2-3 inches) of Soil Improver on the soil surface and then dig into the top 15–20cms (6-8 inches). This will enhance the soil organic matter levels, improve fertility, provide a slow-release source of nutrients, increase the soil water-holding capacity and if repeated annually, gradually improve the soil structure.
Planting Out
SylvaGrow® Soil Improver can be used as a planting medium for roses, shrubs, trees, herbaceous perennials and bedding plants in order to add valuable organic matter and nutrients. Simply blend at 1 part to 4 parts of the back-fill soil. Always ensure that the plant is watered to capacity before planting out and if necessary, immerse the roots in a bucket of water for half an hour prior to planting. Ensure that the planting pit is well-integrated with the wider soil with no smeared sides or other impediments to root exploration beyond the planting hole.
Lime-hating, ericaceous plants
SylvaGrow® Soil Improver is not suitable for raising lime hating, ericaceous plants in containers.
Tags: Compost | Advice & Inspiration | Fargro Home & Garden
Comments (0)
Why not be the first to send us your thoughts?