How to set up your polytunnel, cage or cloche
5 Minute Read
If you've purchased our plant protection equipment and need a hand with getting started, take a look at the helpful instruction guides here. Protecting your garden from pests couldn't be simpler with our range of high-quality polytunnels, cages and cloches and with no tools required for assembly, you'll be up and running in no time.
Navigate the products below to find your model and if you still need a hand, please get in touch on 01903 258 200 or email us via help@expertgardensupplies.co.uk
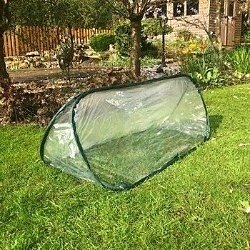
Pop-up triangle cloche instructions
In the event of snow, we strongly recommend that cloches are taken down and stored. They are NOT designed to withstand the weight of any significant snowfall. Snow will collect on the surface and your cloche is likely to collapse.
1. Remove the product carefully from the storage bag, taking care not to lose the ground pegs.
2. Select a reasonably flat area to use your Pop-up cloche.
3. Open out the cloche. When erected, peg down firmly, using the sewn tabs around the base.
4. In windy areas, you may need to add extra pegs for maximum stability.
5. At the end of the season fold away the cloche, allow it to dry and either lay flat or store in the bag provided until next season.
6. If your product becomes twisted or distorted, simply fold it up and open it out again. The metal has memory, and will eventually correct itself. If the metal on one side remains distorted, try twisting it with your fingers to correct its shape.
To fold away your cloche:
1. Grip diagonally opposite ends of the cloche.2. Bring hands together so that the cloche is folded in half and forms loops on either side, with your left hand gripping the two spring steel sides in the middle.
3. Place your right hand on the bottom of the loop.
4. Move your right hand inwards and upwards, bringing the loop into the centre. At the same time, manoeuvre your left hand to allow the spring steel side slightly nearer you to slip underneath the one slightly further away.
5. Continue to push right hand towards the centre to form 3 loops (one on top of the other).
6. Bring loops together into a circle.

Download the instruction guide
Save and print your instruction guide using the link below. If you have any further issues or would like to ask us a question about your plant protection equipment, please get in touch via help@expertgardensupplies.co.uk.find out more
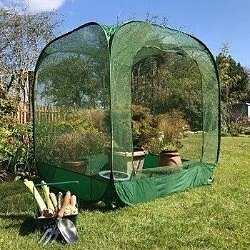
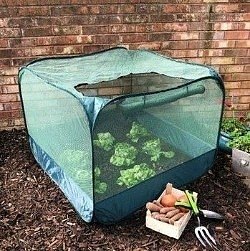
Pop-up net cage instructions
If you live in a particularly windy area, you may find that your pop-up cage can be blown over. While this will not harm the cage, there are a few ways to prevent this from happening.
1. Peg cage into the ground using the tabs sewn into the bottom edge (for particularly light soils, you may wish to use longer pegs or corkscrew pegs)
2. Push two bamboo canes or pieces of tubing firmly into the ground on either side of the cage, close to the sidewalls. Add extra canes if needed in extreme conditions.
3. Many of the cages have sewn tabs in the middle of the LH and RH sides at top and/or bottom. Thread string or cable ties through these and attach to the canes.
4. If your cage has no side tabs, push the canes into the ground as above, thread string or ties through the seams, and secure to the canes.
5. At the end of the season remove the canes, fold away the cage and store in the bag provided until next required.
In the event of snow, we strongly recommend that cages are taken down and stored. They are NOT designed to withstand the weight of significant snowfall. Snow will collect on the mesh and your cage is likely to collapse.
Please note: Occasionally, one of the metal hoops which hold the sides can twist inside the seam.
If this happens, feel round until you find the two ends of the twist and return the hoop to a flat plane. This will enable you to fold the net properly.
If this happens, feel round until you find the two ends of the twist and return the hoop to a flat plane. This will enable you to fold the net properly.

Download the instruction guide
Save and print your instruction guide using the link below. If you have any further issues or would like to ask us a question about your plant protection equipment, please get in touch via help@expertgardensupplies.co.uk.DOWNLOAD HERE
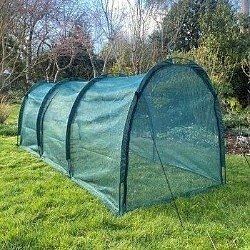
Net tunnel instructions
The net tunnel kit includes:
• Tunnel
• 4 or 6 carbon rod sets (depending on model)
• 4 guy ropes (ropes may already be attached to tunnel)
• Bag of ground pegs
1. Find a suitable location for your tunnel - fairly flat ground is best. Lay out all of the components, ensuring no parts are missing. Next open out the tunnel.
2. Assemble carbon rod sets to form long rods. Take each rod and insert through the external sewn tabs in the middle and end sections of the tunnel, easing through to the other side.
3. Locate one end of the rod on the inner hole of the plastic locator (attached to the strap below each seam). Bend the rod gently in a curve, easing the seam back along the rod as you go. When the loop is complete, put the other end of the rod in the plastic locator at the other end of the strap. DO NOT OVER BEND.
4. Place the tunnel in a suitable location in your garden, then gently stretch the tunnel out to it's full length. Attach the guy ropes to the tabes located at the top of the tunnel (2 guy ropes at each end). Peg down as required. Peg down the sides of the tunnel through the plastic locators along each edge, then finally, peg down the guy ropes at each end.
TIPS:
• Garden tunnels could move and become damaged in very strong winds. If you have particularly light soil or windy conditions, we recommend using longer pegs to anchor the tunnel.
• The tunnel has sewn pockets along both sides, these can be filled with a ballast for extra stability.
• For added stability in windy weather, push a bamboo cane or similar pole vertically into the ground at each end of the tunnel. Tie the cane or pole to the top of the end hoops.
• To ensure your tunnel stays in optimum condition, we recommend dismantling, wiping down and storing somewhere dry at the end of the growing season.

Download the instruction guide
Save and print your instruction guide using the link below. If you have any further issues or would like to ask us a question about your plant protection equipment, please get in touch via help@expertgardensupplies.co.uk.DOWNLOAD HERE
View all plant protection equipment

Shop all polytunnels, cages and cloches
- Assembles instantly - no tools required
- Tough, weatherproof and built to last
- Protects medium sized crops from birds and pests
- Packs into a space saving bag for storage during the winter months
Comments (0)
Why not be the first to send us your thoughts?
Leave A Comment
Most popular articles
1
Plastic plant pots dimensions and uses2
Peat vs Peat Free - Choosing the right Potting Compost3
How to Grow Watercress at home in plant pots4
January Jobs5
Our guide to seed sowing compost